Snow Globe
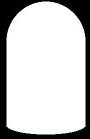
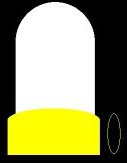
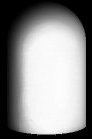
Open a new image with a black background. Make it large so it is easy to work with. We
can scale it down later. With the selection tool select a circle at the top of your image.
Now flood fill it with white. Again, with the selection tool select a rectangle over the
circle and flood fill it with white. Finally select an ellipse at the bottom of the the
rectangle, and flood fill it with white. (NOTE: when you make your
selections, if you choose the move tool and use the right mouse button, you can reposition
the selection where you want it.)
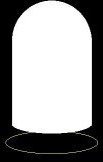
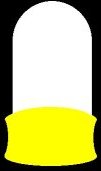
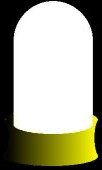
Now to make the base. Make a copy of your finished dome from above to work from. To start
make a ellipse selection at the bottom of your dome (just a little wider than the width of
the dome), and with the move tool and right mouse button, move it to the dome edge. Then
flood fill it with a different color (any color will do, it is just to keep track of it).
Next select a rectangle to extend the ellipse like we did to make the dome. Flood fill
this selection too.
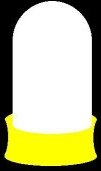
With the selection tool, make an ellipse seletion on the side of the base about the same
height as the base. Use your move tool and right mouse button to position it into place
then flood fill it with color. Repeat this on the other side. Now make an ellipse
selection at the bottom of the base (the same width as the base), move it into position
and flood fill. This will give the base it's roundness. Finally paste your dome over the
dome already present, and the top edge of your base.
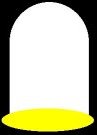
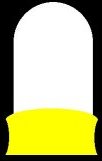
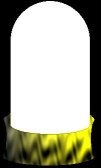
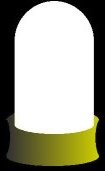
Now with the magic wand tool, select your base (NOTE: to make sure
you select the entire base you may need to adjust the tolerance or use the shift key when
you click to choose multiple sections until the whole base is selected). Next, with
black as your background and some shade of yellow as your foreground select the flood fill
tool settings; Linear Gradient options: Direction=270. And then flood fill it again with
settings; Direction=90. You may need to adjust the tolerance and opacity to get the
blended effect you like. Now you could leave the base like this, but if you wanted to give
it a metal effect continue on...
 |
 |
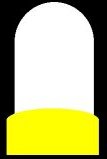
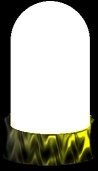
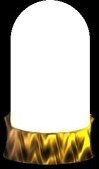
The next step requires Filter Factory's Gallery A: Pool Shadow filter. With your base
still selected, choose Image/Plugin/Filter Factory A/ Pool Shadow and adjust the settings
to your liking. Now you could use the base as it is ore continue and apply Hot wax by
Image/Other/Hot Wax Coating. Again, you could just use the base this way, or you could
Brighten and Contrast it or Adjust RBG to make it more gold. Experiment with
Colors/Adjust/...whatever.
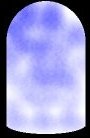
Now open another copy of your dome to work on. With the magic wand tool select the white
dome area. Then with the air brush tool settings; Paper Texture=clouds, Size=30 to 40,
Shape=round, and Opacity and Density set to whatever you like, make a misty background
just in your white dome area. Choose a nice image (I am using some victorian clip art that
I purchaced in a holiday clip art package), you may need to clean up the background so
that you can select just the image. Now Edit/Copy this image and Edit/Paste as Trasparent
Image onto your dome. (NOTE: For the image to paste with
transparency the background color of your image must be selected as the background color
in the color palette.) Now promote this image to layer. Open a copy of your dome
again. You will need to open the original and copy it again. Select it with the magic wand
tool. Now with black as your background color and white as your foreground select the
flood fill tool settings; Sunburst Gradient, options: Both Offsets=0. You can adjust the
Opacity and Tolerance to your liking.
Now with this shadow image Edit/Copy and Edit/Paste as New Layer over your dome with the
image inside. Adjust the opacity of the shadowed layer opacity until your image shows
through. This will give the dome a shadowed effect and round it out some. Finally Edit/Cut
this image and go back to the image you made with just the dome and base. Edit/Paste as
Transparent, this image over over the existing dome (making sure your background is
selected for proper transparency). Any color you wanted to transfer, but didn't, can be
touched up with the paint brush tool.
 |
 |
To top it off... Create a new layer. On this layer choose the air brush tool settings;
Size=2 or 3, Shape=round, and make white snowflakes over the image within the dome. Now
choose Image/Blur/Soften (or Soften More if you like). And now you are done! (NOTE: I did all the work at a much larger size to make it easier to see
and make touchups, then I resized it to make it web-ready!)

By making 2 to 4 copies of your image before the snowflakes and adding snowflakes in
different patterns, you can use Animation Shop to animate your snowglobe.
I got this tutorial from Michele and have
made some adjustments that I found made it a little easier.
|