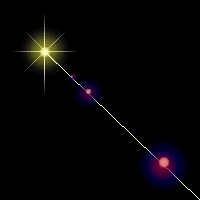
Open a new image any size 24 bit with a black background an white or
another light color as your foreground.
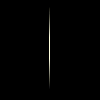
With the line tool width=1 make a vertical line in the middle of your image. |
 |
| Go to the Image/Blur/Motion Blur with settings: 30 pixels and 0
degrees. |
 |
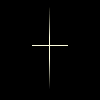
| Create a new layer and make a horizontal line with your line tool.
Perform the motion blur on this layer at 90 degrees. |
  |
| Create a third layer and make a short line at 45 degrees from the
center of the cross. Perform motion blur again at 315 degrees. |
  |
| Now you will use the air brush tool 3 times whith the Paper
texture=None Shape=Round, Density=100, Hardness=0, Step=100. Other settings are as
follows: |
Opacity=10
Size=50
Click Once
 |
Opacity=30
Size=30
Click Once/Twice
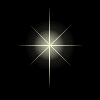 |
Opacity=50
Size=10
Clice 5 Times
 |
|
| You can try different colors and settings to achieve different types of
stars. Below is a continuation of this tutorial on star flares off your star. |
 |
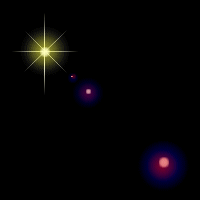
| With your new star open, create a new layer. On this layer use the line
tool to create a line that your flares will follow. |
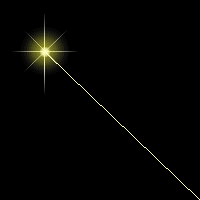 |
| Make the background layer active and use the same technique as above to
make the glow around your star. |
 |
| Then delete the new layer that contains the line your flares are
following. |
 |
The image below was made by opening a new image and typing my text,
then promote it to layer.
Next make a copy of your star and paste it over the text as a new layer.
Adjust the Opacity of the new layer in varying stages (saving each stage) as a new image.
Then use Animation Shop to create the animated GIF you see below. |
 |
| This is an image I was working on for a website logo. I used the above
tutorial then I used the Fade transition in Animation Shop. |
 |
|