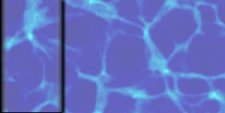
| Open a new image 300x150 with a white background. Promote this to layer
and name it color. Add two new layers to it, naming them shadow and bevel. On the layer
called bevel make a square selection starting at the upper left corner and ending at the
bottom. Now (with the background selected as black) buttonize this selection by
Image/Effects/Buttonize settings; Height=1, Width=10, Opacity=50 to 60, Transparent Edge
selected. |
 |
 |
Next go to the shadow layer and add a dropshadow by
Image/Effects/Dropshadow settings; Shadow=black, Opacity=100, Blur=10, Vertical Offset=0,
Horizontal Offset=3 to 5. |
| Now on the base or color layer, flood fill with the color or texture of
your choice. Select Layers/Merge/Merge All (flatten). |
 |
 |
Now with the selection tool make a rectangular selection in the center
of the image. You may elect to keep the shadow on the left edge or not. The border on this
page has the left edge the image in the tutorial does not. Next Edit/Copy your cropped
image. |
| Finally open a new image 1200 to 1500 by a few pixels less in height
than your original image. Paste your original image into this new image and line it up on
the left edge (by making it a few pixels less in height you are sure to have a seamless
image for your background). |
 |
Note: when filling your image with a pattern or texture make sure
you begin your image large enough so that when you crop the selection you can choose
Selection/Convert to Seamless Pattern instead and when you use it as a background it will
blend smoothly.
|