A mask is a template made from a black and white image and used to
alter your image by fading or darkening areas (i.e. masking).
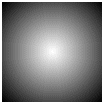
First create a mask. I just used the fill tool on a 100x100 area with the settings on
sunburst gradient and black as the foreground and white as the background. |
 |
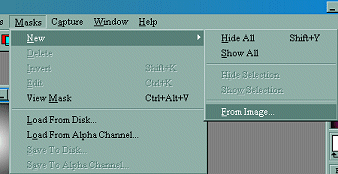
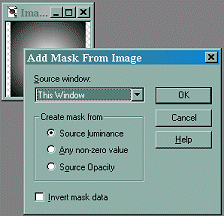
| Next, if you want to save this mask Select Masks/New/From Image... when
the menu come up choose source window as This Window (make sure your mask image is
active). |
  |
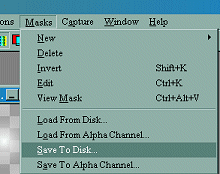
| This will prepare your mask to save. Choose Masks/Save to Disk. When
the Save Mask Channel menu comes up, give your mask a name and save it. |
  |
| Open your image. This is my brother Mike (he's single!!!) You can
either choose to Load the Mask from Disk (and use your saved mask) or with your mask image
open choose Masks/New/From Image... when the menu comes up choose source window as
whatever the name of your mask is (i.e. Image1), but do not choose This Window. Click ok
and now your image is merged with the mask. |

  |
| To make a darken fade click on the imge of Mike to go to the faded
borders tutorial. |
 |
|