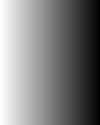
| First we will make a mask. Open a new image any size (about 200x250 is
good). Choose the flood fill tool settings; foreground=white and background=black,
Tolerance=200, Fill Style=Linear Gradient, Options: Direction=90 degrees, and fill your
image. In PSP6 - you will want to make a gradient that
blends from white to black. If you have the gradient Foreground to Background or Foreground-Background,
you can just set your foreground to white and background to black. |
 |
 |
Next choose the selection tool and make a selection of your image
starting in the upper left corner. Select a rectangle 125x250 (if your image is 200x250
the width should be about 60-65% of the original). Make a copy of the selection
(Edit/Copy). Edit/Paste as New Image then Image/Mirror. Now copy this image. |
| Go back to your original image and Image/Add Borders settings;
Symmetric NOT checked, all sides=0 except left=125 (or however wide the width of your
selection was, about 60-65% of original). |
 |
 |
Paste the second image into the original and align it in the new left
border. Now to save this mask do the following:
Masks/New/From Image. Settings;
This Window=selected,
Create Mask From=Source Luminance,
Invert Mask Data=checked.
Now save your mask by Masks/Save to Disk and save them as a msk file (i.e. bar.msk). |
|
| Open a new image that is tall and narrow (however wide you want to make
your bars) with a black background. |
 |
 |
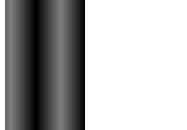
Select Masks/Load from Disk and load your bar.msk. Then
Layers/Merge/Merge All. |
| Now select Colors/Colorize settings; whatever hue and saturation you
want to color your image. Then Edit/Copy and Edit/Paste as New Selection onto your desired
background (I choose black to make it stand out more). |
  |
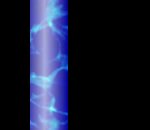
| This is the solarized effect. Open your tall, narrow image with the
black background. Add your mask then merge all like above. NOW select Colors/Solarize
settings; Threshold=125. Now all it needs is to be colorized and pasted onto your desired
background. |
  |
| Another technique is to open your tall, narrow image with the
background color you want your bar to be. Add your mask, then merge all again. This gives
a little more pastel color. |
  |
| Yet another technique is to open your tall, narrow image with the
background color of your choice (this will be your highlight) and promote it to layer. Now
add a new layer and add your mask. Flood fill it with either the same color or a
contrasting color (this will be the color of your bar). Change the opacity of the first
layer until you reach the intensity you want, then merge all layers. This gives your
center highlight a little color. |
  |
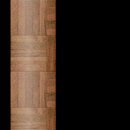
| The final technique is with textures. Open your tall, narrow image and
flood fill it with your pattern/texture (you may need to adjust the brightness and
contrast of your texture to make it a bit darker). Now promote it to layer. Add a new
layer and add your mask. Flood fill it again with your pattern. Change the opacity of the
first layer until you reach the intensity you want, then merge all layers. |
  |
|