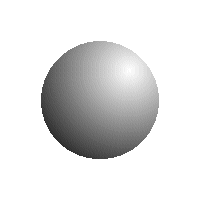
Open up your background texture.
With the select tool draw a cirle on the background and select Edit/Copy. |
 |
 |
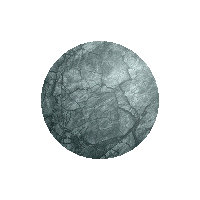
Then open a new image about 1.5 times bigger than your background image
and paste the selected image into the center as a new selection. Deselect it, Edit/Copy
and Edit/Paste as New Image, then Reselect the sphere in your new image. |
| The selected copy of the sphere will be use to make the lighting
effects. Select the fill tool: Mode=none, tolerance=0, fill=sunburst gradient, options:
vertical=75, horizontal=25, forground=white, background=black. Fill the selected sphere. |
 |
 |
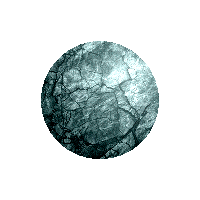
Promote Image 2 (shadow) to a layer. Edit/Cut Image 1 (texture), then
paste it as a new layer over Image1. Adjust the opacity of Image 2 until the texture and
gradient are blended (about 50). |
| Now adjust the brightness by 1 and contrast by 50, or whatever makes
your image look good. |
 |
|