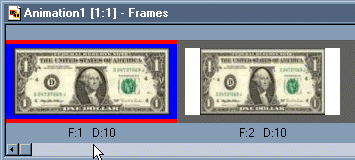

| This tutorial uses both PSP and Animation Shop to make a spinning object - in this case a dollar bill. First I begin in PSP with my original image (IMAGE#1). I make a copy using Edite/Copy. Then I Edit/Paste as New Image. So now I have two copies. |  |
 |
My original image is 155 pixels wide. To give the illusion of a perspective (or spinning away from the eye), I need to make my second image (IMAGE#2) narrower without making it shorter. I go to Image/Resize. Make sure the radio button is on Pixel Size and Maintain Aspect Ratio is not checked. The dimensions of my original image were 155x67. I enter the height as 67 pixels, but I want to begin the narrowing process. I figure about a 16% decrease (about 25 pixels) at each step would be enough. So I enter 125 pixels for the width, and click OK. |
| I now go to Edit/Paste as New Image again. I apply the same narrowing technique on this copy (IMAGE#3) that I did on the second copy (IMAGE#2). I keep pasting new images (or new copies of the original), and resizing them until they are as narrow as the program will let me (about 3 pixels wide). Along the way I have saved each of my images as image1.gif, image2.gif, image3.gif.... Now it is time to open up Animation Shop. |
| I click the Animation Wizard icon from the menu or tool bar, and follow the prompts. At the first screen I will choose the dimensions. I almost always choose Same as the first image frame - click Next. | ||||||||||||||||
|
| At this screen I choose what my background/canvas will be. I choose Opaque and then you have the option to select a color (I choose white for this animation) - click Next. | ||||||||||||||||
|
| At the next screen I am prompted to choose my aspect and position of the frames. Make sure that Scale Frames to Fit is not checked. I choose to center the frames, and I choose to fill with canvas color. This will fill, any sections that do not fill the entire frame, with white (my selected canvas color) - click Next. | ||||||||||||||||
|
| At the next screen I'm prompted choose how log to loop/run the animation and how log the frames are displayed. I select to repeat the animation indefinitely, and I display each frame 10/100th of a second - click Next. | ||||||||||||||||
|
| The next screen lets me add my images. I click the Add button and select my images from the directory on my hard drive. You have the option to add as many images you would like and you can reposition them here by highlighting them and moving them up and down with the appropriate buttons - click Next. | ||||||||||||||||
|
| At the FINISH screen just click on the finish button and Animation shop will begin to create your frames. | ||||||||||||||||
|
| The first thing I do is Edit/Select All then Edit/Copy. Then I click on frame 1 (F1) and Edit/Paste as New Frame. This will insert a copy of all the frames before F1 now making it F10 (or however many frames you have). |  |
| Next I go to the new F1 and select F1 through F9 (to do this click on F1 then hold down the shift key and use your right arrow key to select the frames). Now I go to Animation/Reverse Frames. This will make F9 the new F1 and F1 the new F9. Now click on View/Animation and you will see what your animation will look like. | |||||||||||||||||||||||||||||||||||||||
 |
|||||||||||||||||||||||||||||||||||||||
|